
Creating a Layered Sign using a Scroll Saw
One of my favorite, although sometimes most challenging, parts of creating new sign designs, is how they will come together. Many designs may seem straight forward but the 2D nature of them can sometimes create a bit of a puzzle in order to get the look I'm envisioning. Another super talented maker approached me with the idea for this design and I was so excited to try to learn some new techniques! If you're new around here, you should know that 99% of the time I follow the Moana way of teaching aka "I am self taught".
So I created the design using my Silhouette software. The reason I use this software above others is because I need to create a stencil for myself. Once it's created in the software, I can break up the layers into their own parts, then my machine will trace my designs on vinyl. I use the vinyl to adhere to the material I'm cutting to follow with my blade. There are many methods for creating a stencil but the majority of the time this works for me and I can do it on demand.
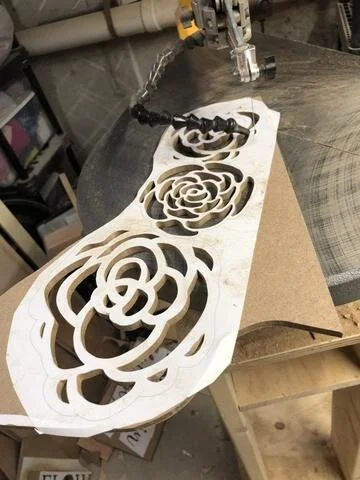
The two thicknesses I use for my material are 1/4" and 1/2". More often than not, my letters are done in 1/2" material. So whenever I am creating a multi layer design, I use 1/4". This design was tricky because I wanted to create the look of petals. The way I ended up creating this was by cutting out the inner part of the "petals" so that you could see the darker color in the background to create a shade of sorts.

When you have inner parts to cut out, you first drill pilot holes into each one. Always cut the inner parts out before cutting out the overall shape. For example, when you cut out and O cut the inside out first, then the outer line. Once the pilot holes are drilled, I have to release my blade and feed it up through the hole, reattach it and then cut. So as you can see here, this one group of flowers was a lot of work! Here is the design prior to me cutting out the overall shape.
Another trick I learned (the hard way I might add) while I was cutting this sign is when you're layering, to double cut the design so that they match up perfectly after. What I mean by that is to layer two pieces of the 1/4" material, cut out the overall shape, then take the top layer off and cut out the inner pieces. I know, I know, this goes against exactly what I just told you to do above, but this is the exception.
When there are more than one color on another layer there are two ways to achieve that look. One is to keep it all one piece and paint each section. I prefer to spray paint my colors on for a smoother finish and so I do a second method. I cut the whole overall shape out and then cut each piece out that will be another color. After they are painted they will fit back together like a puzzle.
Here it is all finished up!
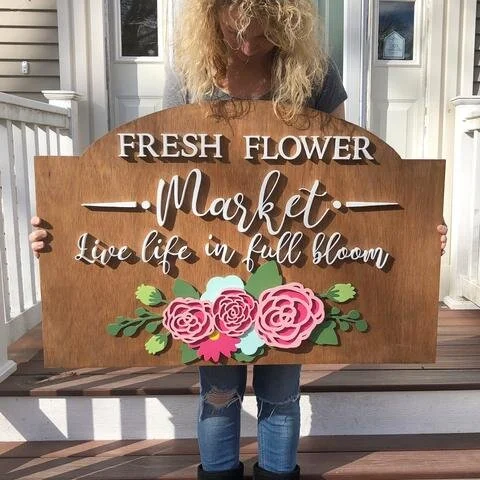
While creating these layers may have been a lot of work, and took some serious brain power to figure out, I think the end results are worth it! It's always a little scary cutting out and assembling the 'puzzle' because it one piece doesn't fit correctly you could have to start over! But luckily it all went together perfectly. You can see how assembly went below - what do you think of this design?